
The Checker Tool:
- From a blank page in SMART Notebook software, type a question and list of answers, ensuring the answers are separate from one another. Grouping and lock the question.
- From the Gallery tab, enter Checker tool and click on Search icon.
- Click and drag the checker tool to the SMART Notebook page.
- Resize by clicking and dragging the resize handle, bottom-right corner of tool.
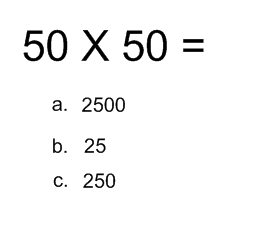

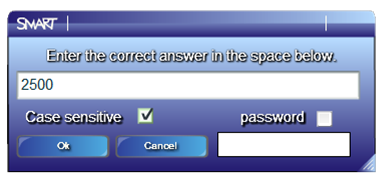
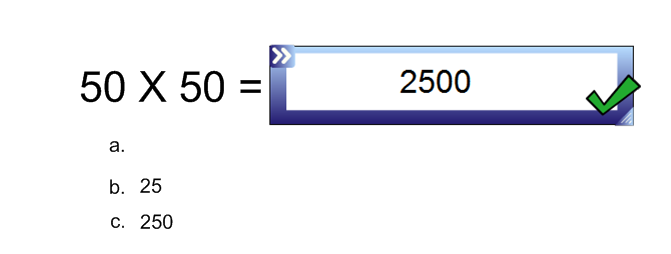
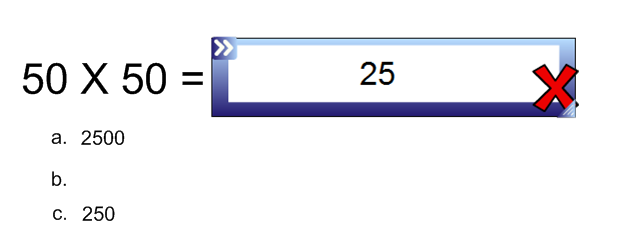
5. Enter the correct answer to the question by click on the edit arrows, top-left corner of tool. Click and drag answer into the Checker too. This tool provides students with instant feedback great interactive tool.
Erase to Reveal:

- From a blank page in SMART Notebook software, enter the information you want to hide.
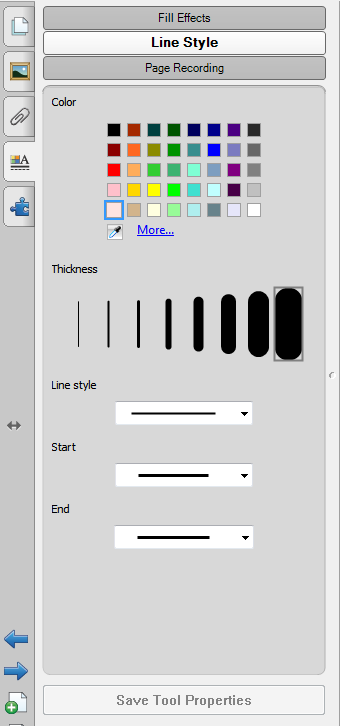
- From the toolbar, click on the Pens tool, click on the Properties tab. Select the color that matches the background and select the widest line thickness.
- From the Properties tab, click on Save Tool Properties.
- From the toolbar, select the Pen tool you created and draw over the object that you want to hide (add digital ink layer). The object will disappear as it will now be the same color as the background.


This effect allows students a hands on experience when using the SMART Board by using the eraser and erase the hidden object(s). Receiving instant feedback as they erase to reveal answers and check their work.
Click to Reveal:

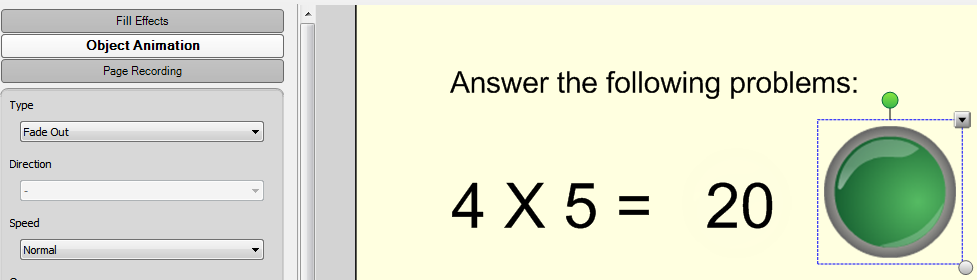
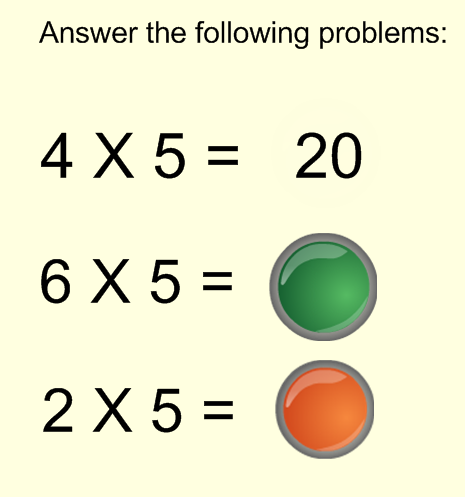
- From a blank page in SMART Notebook software, type/place the information you want to hide and reveal.
- From the Gallery tab, enter button and click on Search icon.
- From the Pictures folder, click and drag a button over the object you want to hide and reveal.
- With the image (button) selected, select Properties.
- From the Properties tab, select Object Animation. From the Type drop-down menu, select Fade Out. Lock the button in place.
Random Generator Tool:
- From a blank page in SMART Notebook software, create a question template. Group all objects and lock in place.
- From the Gallery tab, enter Generator and click on Search icon.
- From the Interactive and Multimedia folder click and drag the Random number generator tool to your page.
- Resize tool by clicking and dragging the resize handle on the bottom-right corner of the tool. Edit or customize by clicking on the edit arrows also located on the bottom-right corner of the Random Generator Tool.
- Click on the edit arrows to save.
- Press within the white space of the tool, press the arrow to place the number on your Notebook page. Press and drag the number to a location on the question.


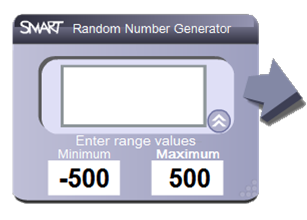

Teachers can quickly generate different values while gaining students interest by interacting with the SMART Board. Also- There are other generator tools; Random letter, vowel, and word --check them out!