Thursday, April 21, 2011

Link or Embed – Create a Dynamic link connecting content and a Excel workbook

Linking versus Embedding Excel data into a word document, do you understand the differences?  They may seem similar but the truth is they generate different processes and accomplish unique functions.  The main differences are, where the data is stored and how you choose to update the data after placed into a Word document.

Linking a file/data creates a link between the original data source (Excel spreadsheet) and the file ( Word document).  When a change is made to the data source the destination file is updated.

Embedding a file places a copy of the original data source into the Word document or the destination file. A change to data source will not be reflected in the destination file.  In effect, embedding creates a static copy of the data.

Insert a Linked Object - Excel Data into a Word document

1.  From Excel, select the data and press Ctrl + C (copy)


2.  From Word, click in the location where the data is to be placed.  From the Home tab, click on Paste and select Paste Special from the drop down menu.  


3.  From the Paste Special dialog box, select Paste link. Within the As list, select Microsoft Office Excel Worksheet Object and click on OK.


Edit/ update date the data in Excel.  You can manually open the Excel document or you can save time and launch the Excel file directly from word.

4.  Right-click the data and select Linked Worksheet Object, from the sub menu, select Edit Link


Or the fastest method--from Word double click the data to open the Excel data source file!


Embed an Object - Excel data into a Word document
**Remember- when you embed an excel object, data in the Word document doesn't change if you update the Excel worksheet.
1.  From Excel, select the data and press Ctrl + C (copy)


2.  From Word, click in the location where the data is to be placed.  From the Home tab, click on Paste and select Paste Special from the drop down menu.  


3.  From the Paste Special dialog box, select Paste.  Within the As list, select Microsoft Office Excel Worksheet Object and click on OK.

Friday, April 1, 2011

6 tips-Getting Smarter using the SMART Board

Grad students in the School of Education Department at SJFC, prompted another blog entry on SMART Board tips.  Undergrad and Grad students at Fisher continue to fine tune their skills, locate resources on Lesson Plans, learn Animation and Page Recording.  Educators are always looking for ways to engage their students learning and the SMART Board is a great tool for the job.

Check out - While attending the Ed Tech Day at Ithaca college, I met a wonderful representative for Tequipment Inc.  She provides training for her company on the use of SMART Boards. This company offers a wide range of Professional Development programs.

Their website has a list of Resources and Lesson Plan downloads for educators.


I use tool bar icons for everything, I often forget to look at the menu items.  You may not know about the Clear Page option under the Edit Menu.

With the newest version of SMART Notebook software it is easy to clear the contents of your entire page, the Clear Page option will remove any unlocked objects for the page. 


Keyboard users: Ctrl + L or (Command +K Mac users)

I have been asked, how do I reset a student activity page?  Students working individually want to repeat an activity or use the same file for a different class.  I thought about it and said; "close the file and don't save", then reopen file or click the Undo button.

Well, this works but not best way and then I read a post form Teqsmart- Creating a Reset button in a Smartboard Notebook file.  It is so simple and easy to create!

1.  From your interactive student page, without moving any of the objects, create a 1 second Page Recording

2.  From the Properties tab, click on Start Recording (record for 1 second only) and then click on Stop Recording - automatically producing a Play Recorder button on the bottom of your slide.


3.  Students can do the activity and move objects within the page, when they are done simply click on the Play button and your page will reset!

Student Activity


Reset Notebook page


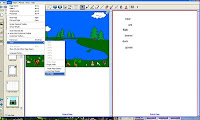
Another great feature is Pin Page.   When you are in Dual page view where you can see two pages in the Notebook at once.  The Pin Page feature will pin the page on the left in place and you can only change he slide on the right.

Great for moving pictures for words from one slide to the next.

1. From the View menu,select Zoom and click on Pin Page.


Where did they go?  Reveal information on a Notebook page by simply changing the font color to match the background.  Create a shape button that will cover the answer, select the shape, click on the down arrow.  Select Order from the drop down list and click on Send to back.
Slide the shape over the text to reveal the answer.

Add text on page/change font color


Right-click/ set background color to match text color


Change shape color/change order
Drag shape to reveal words

The Magic Pen tool - click on the magic pen icon, draw free form shape, letters or words and items drawn will fade out and disappear as it is viewed.  
Draw a circular shape-creating a clear circle, the rest of the image/background will appear grayed out.  The circle can be moved over other parts of the page/image.  


Draw a rectangle - creating a rectangular magnifying glass, move the rectangle to magnify other information.