Lecture Capture will enable you to record the audio of your lecture, the content on the computer and video of the instructor at the podium. Captures can be scheduled to begin and end automatically or an ad hoc recording can be made while in the room.
Scheduled Captures:
A course(s) can be setup to be automatically captured on a re-occurring basis. Scheduled captures are handled differently than Ad Hoc captures.
- A scheduled capture doesn’t require the instructor to login to the Echo 360 appliance.
- Five minutes prior to the beginning of your class, instructors can log into Echo appliance (using desktop icon) to cancel a capture or begin immediately.
Can you change what is published? Yes
- Click on the title of the Echo and click on the blue Edit button at the bottom of the screen.
- Within the Product Group Information section, from the drop down menu select the product and click on Save.
- Within the properties of the session window, scroll down to the bottom of the page and click on Reprocess Media. This will update the captured session.
- The updated echo will replace the original link.


Example: The capture was created with the default configuration (video, display, and audio) and you would like to remove the video. From the Product Group, select #3 Audio +Display - All Formats - High Quality. Click on Save and Reprocess Media.
How do I make my echo available?
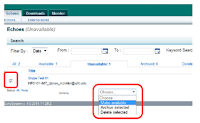
By default all lecture captures are made unavailable. Within the user interface from the Echoes tab echoes can be made available for end users to view.
- Select capture-check box to the left of the title.
- Select Actions-from drop down arrow, select Make available.

What is the Echo Center (course portal)?
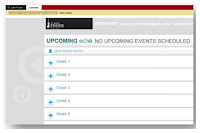
The echo center is a web page that displays all processed lecture captures for each individual course.
- Click on the title of the capture, from the Echo Details page, select the URL for the EchoCenter Page and Copy the URL.
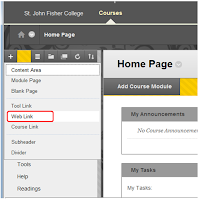
- From Blackboard, create an external link and paste the URL to the EchoCenter page.
- From the Add External Link dialog box enter Name, paste URL, make Available to Users, and click on Submit.
- All captures will be displayed for the course.

How do I add External Media?
 Although you probably use the EchoSystem primarily to record class lectures, you might also want to use it to preserve and distribute other materials. These may or may not be linked to a particular class or lecture. You can upload any of these materials to the EchoSystem then edit and manage them as you would an Echo.
EchoSystem calls these materials "external media" because they are not captured by the EchoSystem. Instead, you upload them yourself. The process of uploading an external file is called "external media ingest" or EMI.
- Upload multiple files to a specific class meeting, though you must upload them one at a time
- Upload files that are not associated with any class or any meeting
- Upload as many files as you like, though your System Administrator may limit the total amount of external media you can upload to a section
- Edit files with the standard Echo editing tools
Add External Media:
1. Log into the User Interface and within the Echoes tab click on the Media Import link.
2. Specify the required settings:
- Term- This setting helps to associate the external media file with a specific class meeting or event.
- Course-This setting helps to associate the external media file with a specific class meeting or event.
- Section- This setting helps to associate the external media file with a specific class meeting or event.
- Start Date-You can use this setting to associate the external media file with a specific class meeting by specifying the day of the lecture.
- Start Time- You can use this setting to associate the external media file with a specific class meeting by specifying the time of the lecture.
- Title- A descriptive title helps viewers to understand what to expect in the media file.
- Description- A description helps viewers to put the information in the media file in context.
- Media Type- Specify the format of the recorded file.
3. Click the Upload File field, browse to the file location on your compute and click on Open.
The Echo System will verify that the file is in an appropriate format and may notify you of any completed text fields.
4. Click on Next, select and confirm an appropriate product group. The lower the quality, smaller the file download size will ensure faster download time for end users.
5. Click on Start Processing. You will receive notification when the Echo System has reprocessed your file and email you a link to the podcast when it has been completed.
6. By default the echo will be listed as Unavailable. Students will have to provide their SJFC network credentials to access the echo.


Hi ,
ReplyDeleteI have a question : How many viewers support? are there a limit?